h.d.buttercup unrequited
We've been conducting a long-distance romance with H.D. Buttercup, a one-of-a-kind furniture store. Sure it's one-sided – but don't we all have one of those relationships? When a recent trip out west coincided with the grand opening of H.D. Buttercup's San Francisco location, it was time to see if this long distance love affair (okay...obsession) had a chance.
The trip didn't disappoint. Here's one great idea from the store...wall of plates. It's been done a million times, but H.D. Buttercup took it to a new level.
 |
| H.D.Buttercup in San Francisco |
 |
| Additional view at H.D.Buttercup in San Francisco |
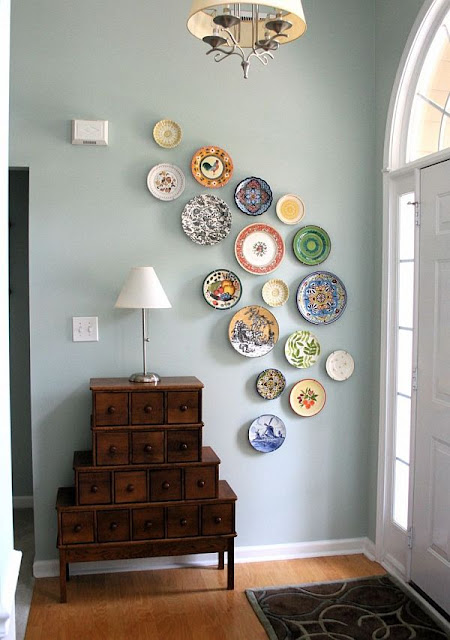
Below are a few home versions that are different, but offer an equal wow-factor
 |
| Here's a great example of a simple version for your home from Homedit blog. I love the asymmetrical layout. |
 |
| Another great example from Apartment Therapy's review of abchaos. See the entire Abchao house tour here. |
If you're wondering how to hang your own collection of plates, Sarah Richardson has a great tip – use epoxy adhesive to attach hardware brackets to back of plates. This will allow you to hang plates while eliminating those unattractive wire plate hangers.
If you can't find plates you love – and a little bit fearless – make your own. Sarah Chiat is the first one we saw use this technique. A few notes if you try it yourself:
- Not knowing what is already on the plate can make reglazing ceramics challenging.
- Definitely don't use an underglaze.
- You can use a china glazes, but it will make the plate not food safe.
- An option we tried (but it is not the same ceramic-look), is acrylic paint made for glass and ceramics. You'll need to bake it or let it sit for 21 days. Then finish with a high gloss clear glaze.

No comments:
Post a Comment